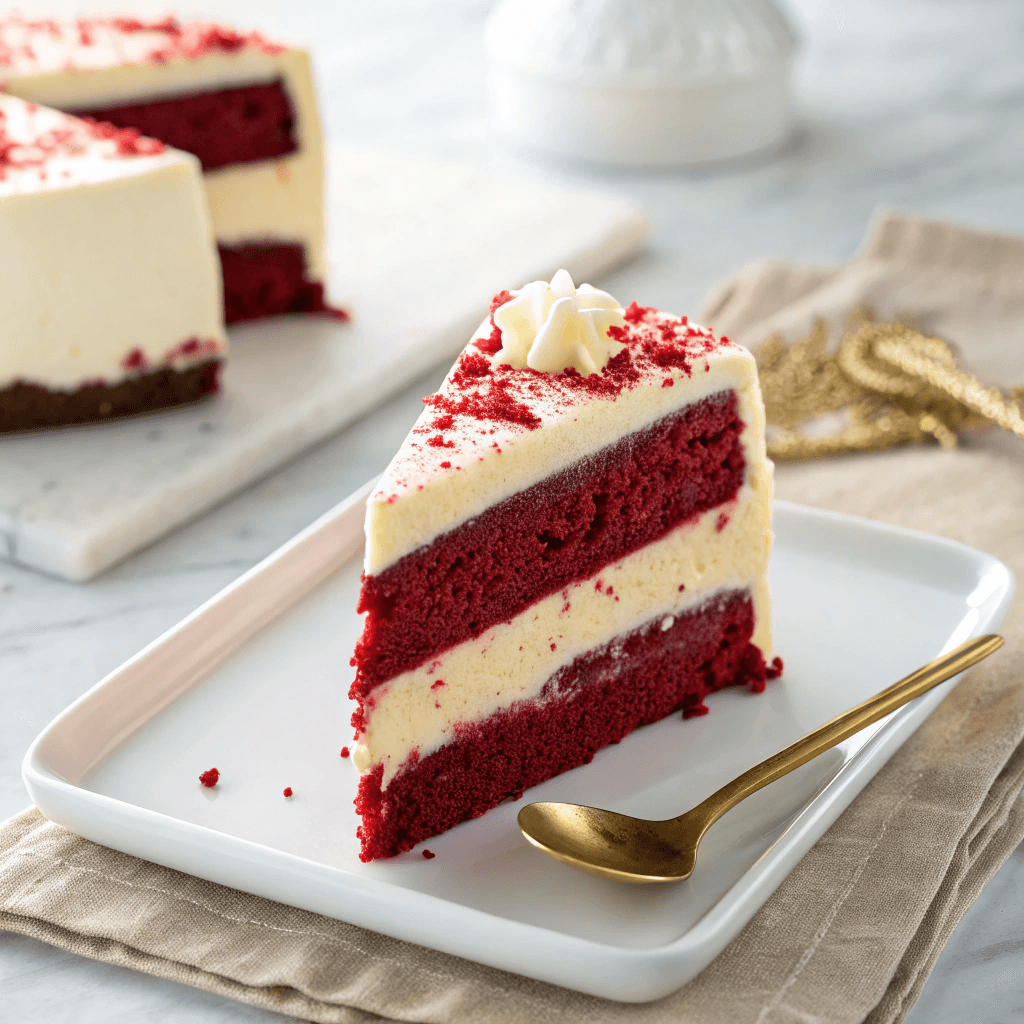
Why choose between two amazing desserts when you can have both? This incredible Red Velvet Cheesecake combines the rich, tangy swirl of cheesecake with the moist, cocoa-infused delight of red velvet cake. Inspired by classic bakery favorites, this showstopping dessert is perfect for special occasions, holidays, or simply when you crave an extraordinary treat that’s surprisingly simple to master.
For those curious about the origins of this classic, learning about the evolution of red velvet cake provides fascinating context.
Table of Contents
Why You’ll Love This Red Velvet Cheesecake

This showstopper is a must-try for any dessert lover. You’ll adore making and sharing this incredible Red Velvet Cheesecake for many reasons:
- Decadent Flavor Combination: Enjoy the best of both worlds with creamy cheesecake nestled between tender red velvet cake layers.
- Velvety Smooth Texture: Each bite offers a harmonious blend of textures, from the moist cake to the rich cream cheese frosting.
- Impressive, Yet Approachable: It looks like it took hours, but our step-by-step guide makes this recipe beginner-friendly.
- Make-Ahead Friendly: Prepare components in advance for stress-free assembly on the big day.
- Perfect for Celebrations: This stunning dessert is guaranteed to be the centerpiece of any party or gathering.
Ingredients
Gather your ingredients to create this unforgettable Red Velvet Cheesecake. We’ve broken them down by component to help you stay organized.
For the Cheesecake Layer:
- 16 ounces cream cheese, at room temperature
- ½ cup granulated sugar
- 1 tablespoon all-purpose flour
- Pinch salt
- ¼ cup heavy cream
- ½ teaspoon vanilla extract
- 2 eggs, at room temperature
For the Red Velvet Cake Layers:
- ½ cup unsalted butter, at room temperature
- 1½ cups granulated sugar
- 2 eggs
- ¼ cup + 1 tablespoon unsweetened cocoa powder
- 6 tablespoons red food coloring, liquid
- 1 teaspoon vanilla extract
- 1 cup buttermilk
- 2¼ cups all-purpose flour
- 1 teaspoon baking soda
- 1 teaspoon salt
- 1 tablespoon distilled white vinegar
For the Cream Cheese Frosting:
- 1 cup unsalted butter, at room temperature
- 4 cups powdered sugar
- 2 teaspoons vanilla extract
- Pinch salt
- 16 ounces cream cheese, chilled and cut into 16 pieces
Notes & Substitutions
Achieving the best results often comes down to a few key ingredient details.
- Cream Cheese: Always use full-fat block cream cheese, not the spreadable kind from a tub. For cheesecake and frosting, ensure it’s at room temperature (unless specified chilled for frosting) for a smooth, lump-free mixture.
- Cocoa Powder: This recipe uses natural unsweetened cocoa powder. It reacts with the baking soda and vinegar to enhance the cake’s signature red hue and tenderness. Avoid Dutch-processed cocoa as it will impact the leavening.
- Buttermilk & Vinegar: These acidic ingredients are crucial. They activate the baking soda, creating a tender crumb and contributing to the vibrant red color. If you don’t have buttermilk, mix 1 cup of whole milk with 1 tablespoon of white vinegar or lemon juice, and let it sit for 5-10 minutes.
- Food Coloring: We recommend liquid red food coloring for this recipe to achieve the iconic deep red. Gel food coloring can also work; you may need less for a similar vibrant result. Adjust to your desired shade.
- Heavy Cream: Heavy cream adds richness to the cheesecake. You can substitute with half-and-half if heavy cream is unavailable, though the texture might be slightly less decadent.
Equipment
Having the right tools makes all the difference for a smooth baking experience.
- 9-inch Springform Pan: Essential for the cheesecake layer, allowing easy removal.
- Two 9-inch Round Cake Pans: For baking your perfect red velvet cake layers.
- Electric Mixer (Stand or Handheld): For beating batter and whipping frosting to perfection.
- Parchment Paper: Prevents sticking and ensures easy release of cakes and cheesecake.
- Wire Cooling Racks: Crucial for allowing cakes and cheesecake to cool completely.
- Rubber Spatula: For scraping bowls and mixing by hand.
- Measuring Cups and Spoons: For accurate ingredient portions.
Instructions For Red Velvet Cheesecake

Follow these step-by-step instructions carefully to create your beautiful Red Velvet Cheesecake. Taking your time with each component ensures a delicious outcome.
Make the Cheesecake Layer
- Preheat your oven to 350 degrees F. Spray a 9-inch springform pan with non-stick cooking spray and line the bottom with a round of parchment paper.
- Use an electric mixer on medium-low speed to beat the cream cheese, sugar, flour, and salt until creamy and lump-free, about 3 minutes. Scrape down the sides of the bowl. Add the heavy cream and vanilla, then beat to combine.
- Beat in the eggs one at a time, mixing for about 15 seconds before adding the next. Use a rubber spatula to mix a few times by hand, ensuring all ingredients are evenly incorporated. Pour the filling into the prepared pan and spread into an even layer.
- Bake until the cheesecake is set and does not jiggle, about 40 to 55 minutes. Remove from the oven and cool on a wire rack for at least 1 hour.
- Once the cheesecake has cooled to room temperature, place it in the freezer for at least 3 hours or overnight.
Make the Red Velvet Cake Layers
- Preheat your oven to 350 degrees F. Grease two 9-inch cake pans. Line the bottoms of the pans with a parchment round, butter the parchment paper, and then flour the pans.
- On medium-high speed, cream the butter and sugar until light and fluffy, about 3 minutes. Turn the mixer to high and add the eggs one at a time, mixing for about a minute after each addition.
- Scrape down the bowl and beat until well incorporated. In a separate small bowl, mix together the cocoa powder, vanilla extract, and red food coloring to make a thick paste. Add this paste to the batter and mix on medium speed until completely combined.
- You may need to stop the mixer to scrape the bottom of the bowl, ensuring all the batter gets color.
- Reduce the mixer speed to low and slowly add half of the buttermilk. Add half of the flour and mix until just combined. Scrape the bowl and repeat the process with the remaining buttermilk and flour.
- Beat on high until smooth. Again, reduce the mixer speed to low and add the salt, baking soda, and vinegar. Turn to high and beat for another couple of minutes until completely combined and smooth.
- Divide the batter evenly between the two cake pans and bake for about 30 minutes, or until a thin knife or skewer inserted into the center comes out clean. Cool for 10 minutes, then remove cakes from the pans and place them on a cooling rack to cool completely.
Make the Cream Cheese Frosting
Using an electric mixer, beat the butter, powdered sugar, vanilla, and salt on low speed until smooth. Mix for an additional 2 minutes, scraping down the bowl as needed.
Increase the speed to medium-low and add the chilled cream cheese one piece at a time. Mix until smooth, then beat for an additional 2 minutes until light and fluffy.
Assemble the Red Velvet Cheesecake
- Level the tops of the cakes if necessary using a serrated knife. Place one cake layer on your chosen serving platter. Remove the cheesecake from the freezer and remove the sides of the springform pan.
- Carefully slide a knife between the bottom of the cheesecake and the parchment paper to remove the cheesecake from the pan bottom and parchment round. If the cheesecake is wider than the cake layers, use a sharp knife to gently shave off some of the sides of the cheesecake so it matches the cake layers’ width.
- Place the cheesecake layer on top of the first cake layer. Next, place the second cake layer on top of the cheesecake layer, upside-down, for a flat top.
- Spread a very thin layer of cream cheese frosting (this is called a “crumb coat”) over the top and sides of the cake.
- Refrigerate for 30 minutes to allow this crumb coat to set, sealing in any loose crumbs. Then, apply another liberal coat of frosting over the entire cake.
- Decorate your Red Velvet Cheesecake as desired! You can use leftover cake crumbs, chocolate shavings, or sprinkles. Keep refrigerated, then let it sit at room temperature for 20 minutes before serving to achieve the best texture.
- Cover leftovers and store in the refrigerator for up to 5 days.
Pro Tips & Troubleshooting
These expert tips help ensure your dessert turns out perfectly every time.
- Room Temperature Ingredients: Always ensure your cream cheese, butter, and eggs are at room temperature. This creates a smooth batter and prevents lumps in both the cheesecake and frosting. Understanding the science behind it can further enhance your baking, as explained by the importance of room temperature ingredients in baking.
- Do Not Overmix Cheesecake: Overmixing incorporates too much air, which can lead to cracks. Beat until just combined and smooth.
- Water Bath for Cheesecake: For an extra creamy, crack-free cheesecake, bake it in a water bath. Wrap the springform pan in heavy-duty foil before placing it in a larger pan filled with hot water.
- Avoid Overmixing Cake Batter: Overmixing develops gluten, resulting in a tough cake. Mix until just combined, then beat only as specified for smoothness.
- Cool Completely: Ensure both cake layers and the cheesecake layer are completely cooled (and cheesecake frozen) before assembly. This prevents melting frosting and structural issues.
- Achieve Perfect Red Color: Don’t be shy with the food coloring. The cocoa powder can mute the red, so ensure your paste is vibrant before adding it to the batter.
- Smooth Frosting: Add cream cheese gradually and mix on low speed initially. This helps prevent lumps and ensures a silky, fluffy frosting.
Serving, Storage, & Variations

This impressive dessert is always a hit! Here’s how to serve, store, and even customize your Red Velvet Cheesecake.
- Serving: Serve your cheesecake chilled for the best stability. However, allow it to sit at room temperature for about 20-30 minutes before slicing for the creamiest texture and easiest cutting. Use a sharp, warm knife for clean slices.
- Storage: Store any leftover Red Velvet Cheesecake tightly covered in the refrigerator for up to 5 days. Ensure it’s well-wrapped to prevent it from drying out or absorbing other food odors.
- Make-Ahead: This recipe is fantastic for preparing in advance. You can bake the cheesecake layer up to 3 days ahead and keep it frozen. The cake layers can be baked 1-2 days ahead, wrapped tightly, and stored at room temperature or frozen. The frosting can be made 2 days ahead and refrigerated.
- Freezing: You can freeze individual slices or the whole assembled cheesecake (unfrosted is best for long-term). Wrap tightly in plastic wrap, then foil. It will keep for up to 1 month. Thaw in the refrigerator overnight before frosting or serving.
- Variations:
- Crust Options: Add a graham cracker crust to the cheesecake layer for extra crunch.
- Cake Flavor: Experiment with different cake flavors like chocolate fudge or vanilla bean.
- Decorations: Use chocolate curls, candied pecans, or a sprinkle of extra red velvet cake crumbs.
Nutrition
Here’s a general nutritional breakdown for one serving of this delectable Red Velvet Cheesecake. Please note that these values are estimates and can vary based on specific ingredients and portion sizes.
| Nutrient | Amount |
|---|---|
| Calories | 669 kcal |
| Carbohydrates | 73 g |
| Protein | 8 g |
| Fat | 40 g |
| Saturated Fat | 23 g |
| Trans Fat | 1 g |
| Cholesterol | 156 mg |
| Sodium | 432 mg |
| Potassium | 164 mg |
| Fiber | 1 g |
| Sugar | 57 g |
| Vitamin A | 1432 IU |
| Vitamin C | 1 mg |
| Calcium | 92 mg |
| Iron | 1 mg |
Frequently Asked Questions
Can I halve the recipe for a smaller cheesecake?
Yes, you can halve the recipe to make a smaller, two-layer cake using 6-inch pans. Baking times will need adjustment.
How can I achieve a vibrant red color?
Use a high-quality red food coloring, either liquid or gel, and don’t be afraid to add enough to reach your desired deep red hue. Natural cocoa powder also helps.
Why is natural cocoa powder specified?
Natural cocoa powder is acidic and reacts with the baking soda and vinegar in the recipe, which is essential for proper leavening and color development in red velvet cake.
Can I use a boxed red velvet cake mix?
Absolutely! Using a boxed red velvet cake mix is a great time-saver for this Red Velvet Cheesecake recipe if you’re a beginner or short on time. Just follow the box instructions for two 9-inch layers.
Conclusion
This Red Velvet Cheesecake is truly a masterpiece, offering a delightful fusion of two beloved dessert classics. With its moist cake, creamy cheesecake layer, and tangy frosting, it’s a guaranteed crowd-pleaser that looks incredibly impressive but is entirely achievable in your home kitchen.
Whether for holidays, celebrations, or a simple weekend indulgence, this recipe will bring joy to every slice. Get baking and enjoy!
Red Velvet Cheesecake
Ingredients
Equipment
Method
- Preheat oven to 350°F. Spray 9-inch springform pan with cooking spray and line bottom with parchment.
- Beat cream cheese, sugar, flour, and salt until smooth. Add cream and vanilla. Beat in eggs one at a time. Pour into pan and smooth top.
- Bake cheesecake for 40–55 minutes until set. Cool 1 hour, then freeze for at least 3 hours or overnight.
- Preheat oven to 350°F. Grease and line two 9-inch cake pans with parchment. Cream butter and sugar. Add eggs one at a time.
- Mix cocoa, red food coloring, and vanilla to a paste. Add to batter. Slowly add buttermilk and flour in two additions. Mix in salt, soda, and vinegar.
- Divide batter between pans. Bake for about 30 minutes or until a knife comes out clean. Cool completely.
- Beat butter, powdered sugar, vanilla, and salt. Gradually add chilled cream cheese. Beat until fluffy.
- Level cake layers. Place first cake layer on platter. Add cheesecake layer, then top with second cake layer. Crumb coat and chill 30 min. Frost fully and decorate.
Nutrition
Notes
- Use full-fat block cream cheese, not spreadable.
- Natural cocoa powder is crucial for color and leavening.
- Buttermilk and vinegar create a tender crumb.
- Gel food coloring is more concentrated, adjust as needed.


