Cherry Yum Yum with Dream Whip is a nostalgic no-bake dessert that’s as easy to love as it is to make. With its luscious cream cheese filling, fluffy Dream Whip layers, and bright cherry pie topping, it’s a Southern favorite that’s stood the test of time.
In this guide, we’ll break down every layer of cherry yum yum with Dream Whip—plus tips, variations, and a few secrets that make this classic dish a crowd favorite.
Table of Contents
My Cherry Yum Yum with Dream Whip Tradition
Growing up in San Antonio, cherry yum yum with Dream Whip wasn’t just dessert—it was a celebration. Whether Mom was prepping for a church potluck or firing up the grill for one of her famous backyard BBQs, you could count on that big glass dish of cherry yum yum chilling in the fridge. I still remember sneaking a spoonful before the crust even had time to set.
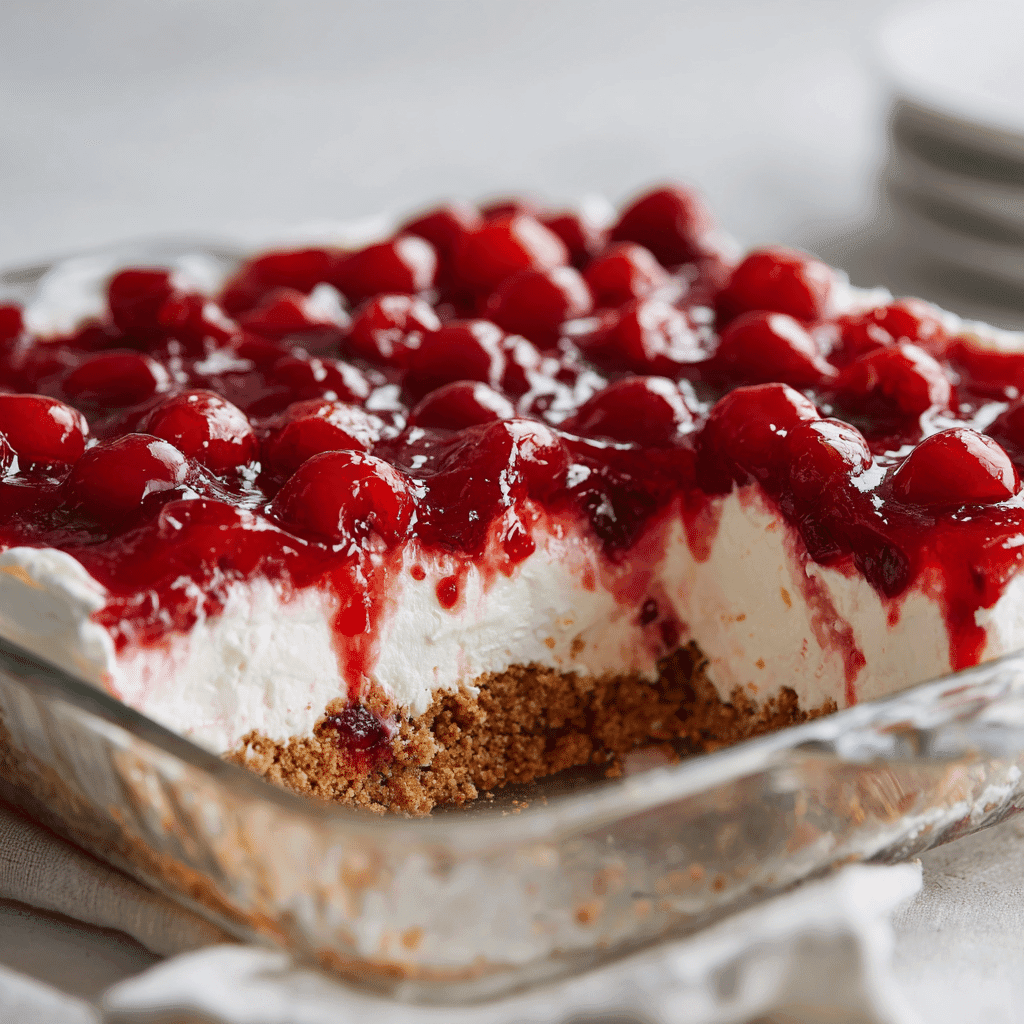
Dream Whip was her secret weapon. Unlike whipped cream, it held its shape in the Texas heat, and that fluffy, creamy texture made every bite feel like magic. The graham cracker crust, smooth cream cheese filling, and sweet cherry topping? That was the trifecta of comfort.
Now, in my own kitchen outside Austin, I’m still making that old fashioned cherry yum yum with Dream Whip—sometimes in jars for road trips, sometimes just because we need a little taste of home. The flavors take me back, and my kids love it just as much as I did.
If you’re curious why this simple no-bake classic never goes out of style, check out my full cherry yum yum recipe. It’s the one dessert I’ll never stop making.
What Is Cherry Yum Yum with Dream Whip?
If you’ve never tasted it, cherry yum yum with Dream Whip is a no-bake Southern dessert layered with nostalgia and flavor. It’s creamy, cool, and always a crowd-pleaser.
What sets it apart from other no-bake treats is its signature whipped filling made with Dream Whip—a shelf-stable whipped topping mix that’s been a staple in Southern kitchens for generations.
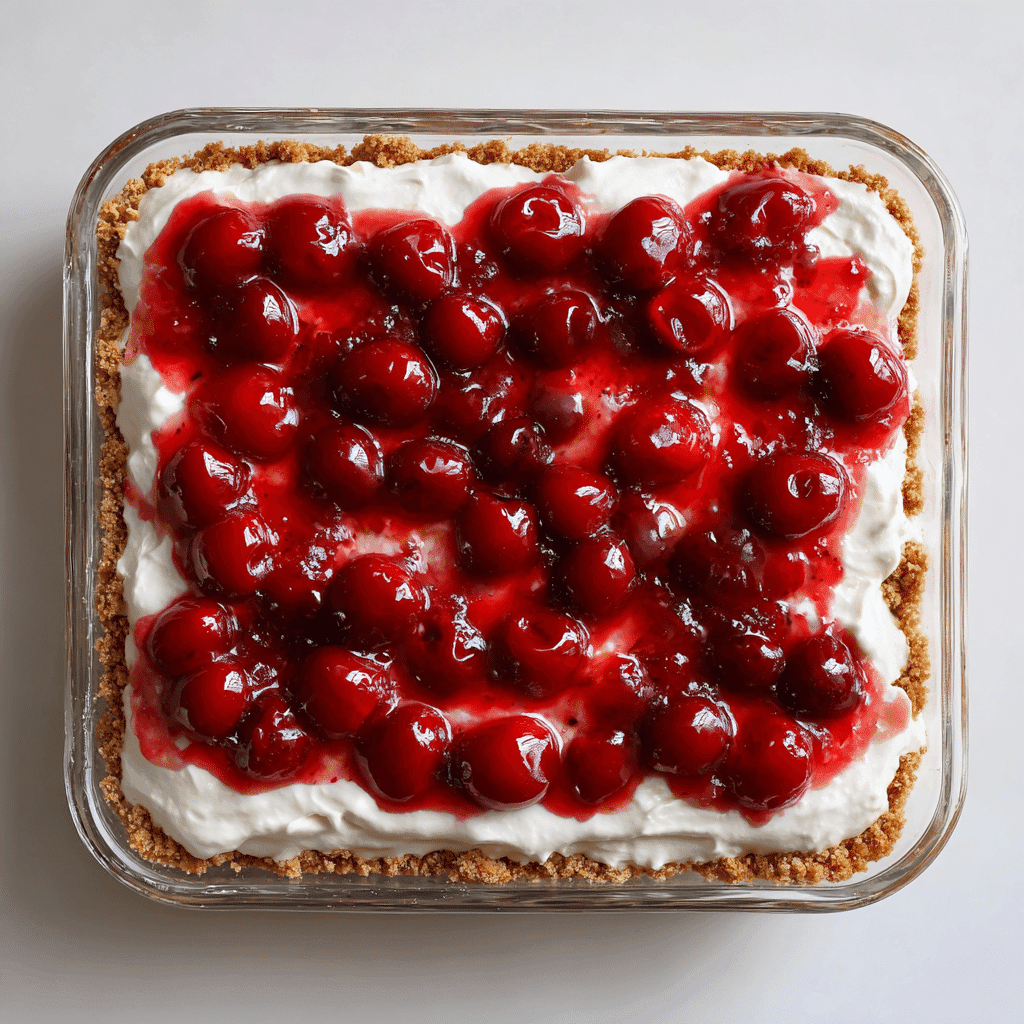
At its core, this dessert has three layers:
- A buttery graham cracker crust
- A light and fluffy Dream Whip and cream cheese filling
- A sweet cherry pie topping
It’s often served chilled, making it perfect for summer gatherings, holidays, or anytime you want dessert without turning on the oven. What makes the filling so special is Dream Whip—it holds its structure better than whipped cream and blends seamlessly with cream cheese to create a cloud-like layer that’s rich but never heavy.
Some folks call it a cherry delight, but this cherry yum yum with Dream Whip and cream cheese is its own Southern legend. And while it’s delicious straight from a tray, you can dress it up in mason jars or parfait glasses for a fancier feel.
Want to see the full breakdown and step-by-step instructions? You’ll find everything you need in this cherry yum yum recipe that’s been passed down in my family for decades.
Ingredients and Prep – It’s Easier Than You Think
What You’ll Need for the Classic Recipe
Making cherry yum yum with Dream Whip doesn’t require anything fancy. In fact, you probably already have most of the ingredients on hand. The magic comes from how they work together—cool, creamy, buttery, and sweet in every bite.
Here’s what you’ll need:
- Graham cracker crumbs and melted butter for the crust
- Dream Whip mix
- Cold milk and vanilla extract
- Softened cream cheese
- Granulated sugar
- Cherry pie filling (store-bought or homemade)
This cherry yum yum recipe made with Dream Whip is easy to customize. Swap in a chocolate cookie crust, try lemon pie filling, or lighten it up with low-fat cream cheese. There’s no one “right” version—just the one your family loves most.
Craving more fruit-forward desserts? You might like this strawberry matcha smoothie as a refreshing pairing.
Step-by-Step Dream Whip Magic
Step 1: Mix the graham cracker crumbs with melted butter and press firmly into your dish. This will form the base layer.
Step 2: Prepare the Dream Whip by beating it with cold milk and vanilla until light and fluffy. Set aside.
Step 3: In another bowl, blend the softened cream cheese with sugar until smooth.
Step 4: Gently fold the whipped topping into the cream cheese. Take your time to keep the texture airy.
Step 5: Spread half the cream layer over the crust.
Step 6: Spoon the cherry pie filling evenly across the top.
Step 7: Add the remaining cream mixture and smooth it out.
Step 8: Chill for several hours to let it set properly.
This recipe for cherry yum yum with Dream Whip is simple, satisfying, and foolproof.
Tips for Texture and Presentation
Don’t Skip the Chill—Texture Depends on It
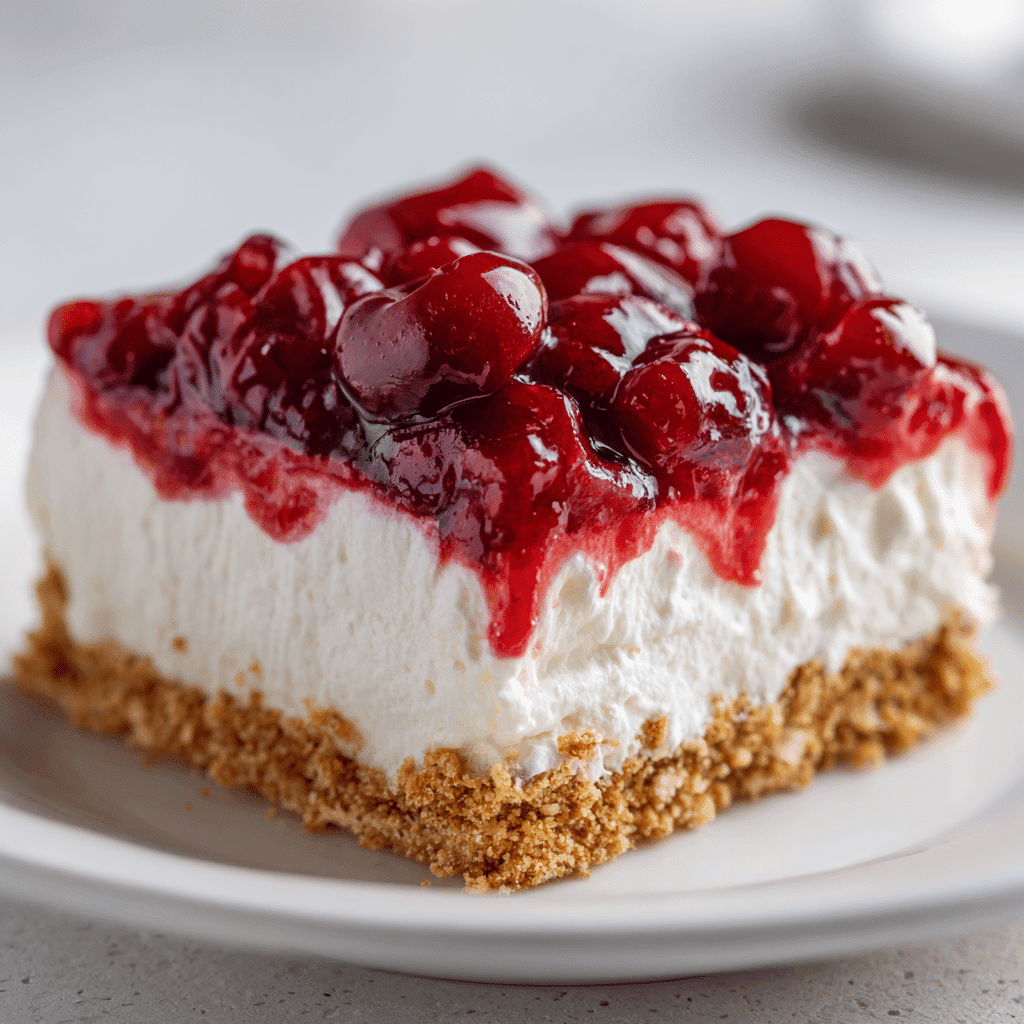
If you want your cherry yum yum with Dream Whip to hold together in beautiful, creamy layers, chilling is non-negotiable. While you can technically serve it after two hours, letting it set for at least four hours—or even overnight—makes all the difference.
A firm texture helps:
- The layers stay clean and distinct when slicing
- The cherry topping avoid sinking into the filling
- The crust bind without crumbling
Another key? Make sure your cream cheese is fully softened before blending. Cold cream cheese creates lumps that ruin that signature fluffy filling. And don’t skip the folding step when mixing the Dream Whip into the cream cheese—it keeps the texture light and mousse-like.
If you’ve ever wondered why your dessert turns out too soft, it’s probably a chilling issue or overmixing.
Cherry Yum Yum with Dream Whip vs Sweet Condensed Milk
Some modern versions of this dessert skip Dream Whip altogether and use sweetened condensed milk. But there’s a big difference. While condensed milk adds sweetness and weight, Dream Whip brings lightness and structure. The result? A creamier, airier bite that doesn’t feel too rich.
That’s why I stick to the original. This cherry yum yum with Dream Whip recipe is all about balance—richness without heaviness, sweetness without overload.
If you like this type of classic, layered no-bake treat, you might also enjoy this twist: vegan cheesecake recipe—surprisingly creamy without dairy.
Whether you serve it in a tray, slice it clean, or scoop it into cups, the key to presentation is letting the layers set and shine.
Customization Ideas – Make It Your Own
Flavor Variations for Every Season
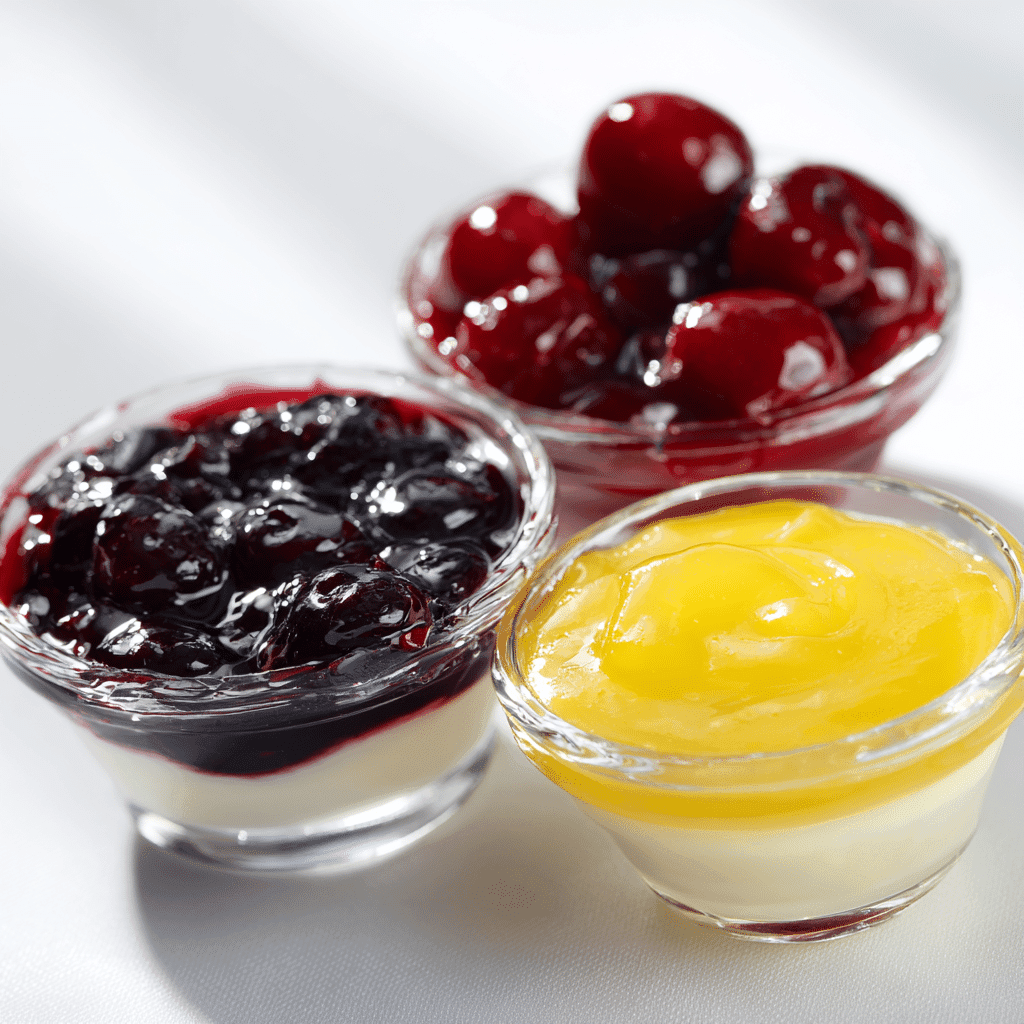
The beauty of cherry yum yum with Dream Whip is how flexible it is. Once you’ve mastered the basic layers, it’s easy to mix things up with new flavors and seasonal twists. Don’t be afraid to get creative—this dessert welcomes it.
Popular alternatives to the classic cherry topping include:
- Blueberry pie filling for a milder, less tart version
- Lemon curd for a bright and zesty kick
- Peach or strawberry preserves during summer months
- Pumpkin pie filling around fall, with a sprinkle of cinnamon
You can even layer fresh fruit in between for added texture. And if you’re feeling bold, swirl chocolate ganache into the top layer before chilling—it adds a rich contrast to the fluffy base.
If you prefer more structure to your slices, go with cherry yum yum pie with Dream Whip—the same layers, just assembled in a pie pan instead of a baking dish.
Serving Styles – Mini, Tray, or Picnic Jar
Presentation matters—especially when you’re serving guests or prepping for events. While a traditional tray works best for feeding a crowd, you’ve got other options.
- Use mason jars for picnics or road trips
- Build individual parfaits for dinner parties
- Create bite-size cups for potlucks or kids’ tables
Each version chills and travels well, making it great for on-the-go desserts. For a fun spin on nostalgic flavors, try it side-by-side with something unexpected like this pickle pizza recipe—both are conversation starters!
This cherry yum yum recipe made with Dream Whip may start as tradition, but it doesn’t have to stay stuck in one form. You’ve got room to play—and every version still tastes like home.
Shelf Life, Storage and Freezing Tips
How Long Does Cherry Yum Yum Last in the Fridge?
If stored properly, cherry yum yum with Dream Whip can last up to five days in the refrigerator. The key is using an airtight container to prevent the crust from getting soggy and the topping from drying out. That means no aluminum foil loosely draped over the dish—snap on a tight lid or wrap it well with plastic.
To keep the texture ideal for serving:
- Store it in a flat, even container
- Don’t stack anything on top
- Avoid repeated temperature changes—take out what you need, then put it right back
The layers will hold firm thanks to the Dream Whip, which doesn’t break down as quickly as fresh whipped cream. That’s one reason I still stick to this old fashioned cherry yum yum recipe with Dream Whip—it stays picture-perfect longer than you’d expect.
Can You Freeze It? The Truth About Dream Whip
Technically, yes—you can freeze cherry yum yum. But should you? That depends. While Dream Whip holds up better than whipped cream, freezing can still affect the creamy texture.
Freezing tips (if you must):
- Wrap it tightly in plastic, then foil
- Thaw in the fridge for several hours (never on the counter)
- Avoid freezing for longer than 2–3 weeks
The crust may lose some of its crunch after freezing, and the cherry topping can become watery. Still, if you’re prepping in advance for a big event, it’s a doable option.
Looking for something lighter while still satisfying? Try our matcha smoothie for weight loss as a balance to this rich dessert.
This cherry yum yum with Dream Whip and cream cheese recipe is best enjoyed fresh, but you’ve got options when life gets busy.
Lighter, Low-Cal and Diet-Friendly Swaps
Calories in Cherry Yum Yum
Let’s talk about the one thing no one wants to ask out loud: how many calories are in a slice of cherry yum yum with Dream Whip? The answer depends on your ingredients, but a traditional square made with full-fat cream cheese, sugar, and regular cherry pie filling usually clocks in around 300 to 400 calories per serving.
But don’t worry—you’ve got options.
To reduce calories without sacrificing flavor:
- Use reduced-fat or Neufchâtel cream cheese
- Swap granulated sugar for a low-calorie sweetener like monk fruit
- Choose sugar-free cherry pie filling
- Cut a thinner slice—seriously, it’s rich, and a small piece satisfies
This dessert doesn’t have to be heavy, and small tweaks go a long way without ruining the texture or flavor.
Gluten-Free and Keto Versions
If you’re following a gluten-free or low-carb diet, you don’t have to miss out. This cherry yum yum recipe with Dream Whip adapts easily.
Here’s how to make it work:
- Swap graham crackers for a gluten-free almond flour crust
- Use unsweetened whipped cream or keto-friendly whipped topping in place of Dream Whip if needed
- Choose low-carb fruit toppings, or make your own with fresh cherries and a touch of erythritol
The result? All the layered goodness, none of the gluten or extra sugar.
And if you’re looking for more balanced recipes that feel indulgent but stay light, this matcha smoothie for weight loss is a great pairing option.
Whether you’re counting carbs or just lightening things up, cherry yum yum made with Dream Whip still fits the bill—without the guilt.
Frequently Asked Questions
How long does cherry yum yum last in the refrigerator?
When stored properly in an airtight container, cherry yum yum with Dream Whip can last up to five days in the refrigerator. The layers hold up well, especially thanks to the stability of Dream Whip. Just be sure not to leave it uncovered, as exposure to air can dry out the topping and soften the crust. For best results, serve within three days for peak texture and flavor.
What is a cherry yum yum?
Cherry yum yum is a Southern no-bake dessert made with layers of buttery graham cracker crust, a creamy whipped filling (often made with Dream Whip and cream cheese), and a cherry pie topping. It’s chilled until firm and served cold, often at family gatherings or holiday meals.
How many calories are in cherry yum yum?
A traditional serving of cherry yum yum can range from 300 to 400 calories, depending on portion size and the specific ingredients used. Full-fat cream cheese and sugary pie filling increase the count, while lightened versions using low-fat cream cheese and sugar-free toppings can bring it down. Regardless, it’s a rich dessert best served in small, satisfying portions.
What is a cherry delight?
Cherry delight is nearly identical to cherry yum yum in structure—both feature a crumb crust, whipped filling, and cherry topping. The biggest difference lies in the filling. Cherry delight usually uses Cool Whip or fresh whipped cream, while cherry yum yum with Dream Whip has a fluffier, more stabilized center that holds its shape better. Some also say cherry delight has a firmer crust or includes gelatin, but that depends on the recipe.
Conclusion: Why This Dessert Still Feels Like Home

After all these years, cherry yum yum with Dream Whip hasn’t lost its charm. It’s more than just layers of crust, cream, and cherries—it’s layers of memory. From childhood potlucks in San Antonio to weeknight desserts in my own home outside Austin, this recipe never fails to bring people together.
It’s simple, flexible, and always satisfying. Whether you make the classic version or switch things up with new flavors or dietary tweaks, it’s the kind of dessert that reminds you of why you cook in the first place—to share, to comfort, and to make moments stick.
If you’re ready to try it for yourself, or just need a refresher on how I put it together, check out my full cherry yum yum recipe and bring a little Southern comfort to your table.
Because sometimes, the best desserts are the ones that never left the family table.
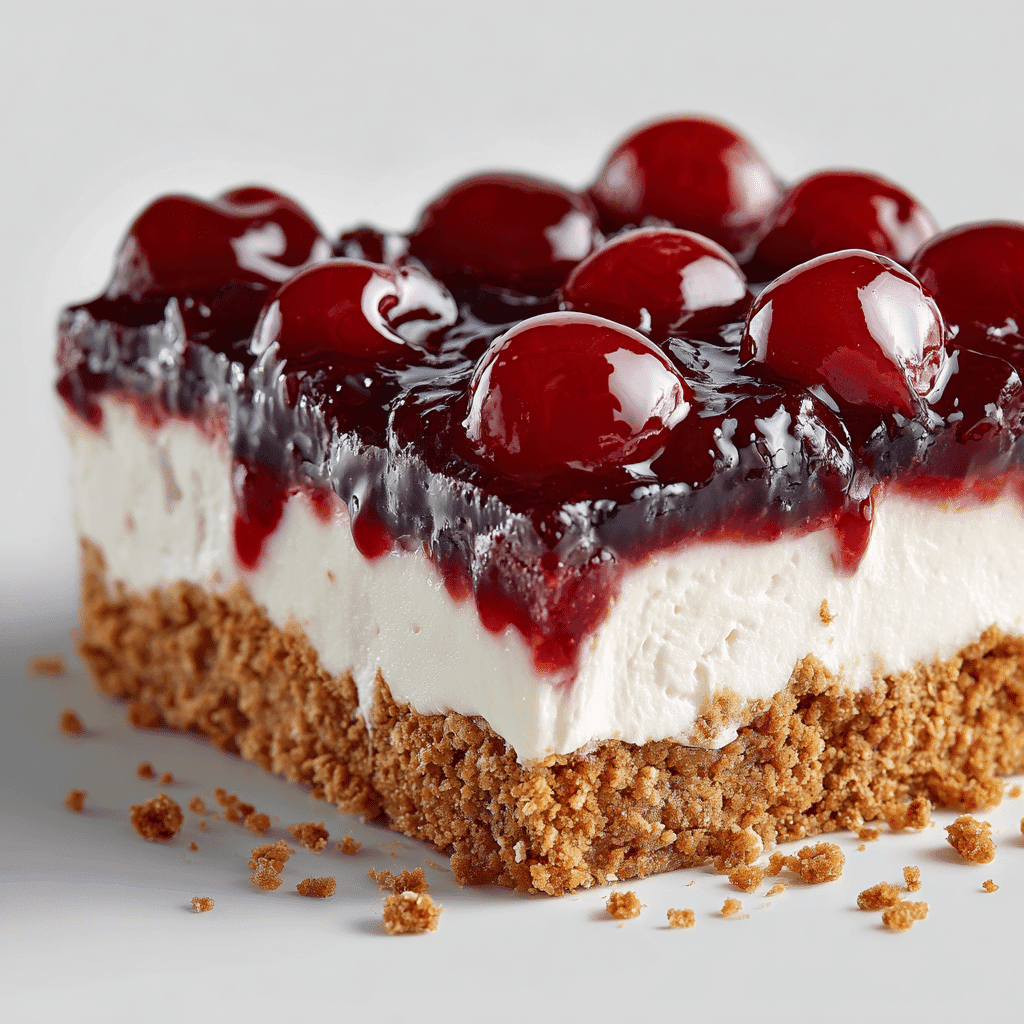
Cherry Yum Yum with Dream Whip
Ingredients
Equipment
Method
- Mix the graham cracker crumbs with melted butter and press firmly into your dish to form the base layer.
- Prepare the Dream Whip by beating it with cold milk and vanilla until light and fluffy. Set aside.
- In another bowl, blend the softened cream cheese with sugar until smooth.
- Gently fold the whipped topping into the cream cheese to keep the texture airy.
- Spread half the cream layer over the crust.
- Spoon the cherry pie filling evenly across the top.
- Add the remaining cream mixture and smooth it out.
- Chill for several hours to let it set properly.
Nutrition
Notes
- For best texture, chill the dessert for at least 4 hours—overnight is even better.
- Be sure cream cheese is fully softened before blending to avoid lumps.
- Gently fold Dream Whip into cream cheese to keep the filling light and airy.
- Store leftovers in an airtight container in the fridge for up to 5 days.
Tried this recipe?
Let us know how it was!Looking for more comfort recipe like this? Come hang out with me over on Facebook and Pinterest where I drop new recipes, family favorites, and quick how-to guides almost every day.


