Welcome to the easiest way to make elegant desserts! These mini cherry cheesecakes are the perfect bite-sized treat for any occasion. Whether you’re hosting a party, celebrating a holiday, or simply craving a quick dessert, these individual cheesecakes fit the bill. Their simple preparation and delightful taste make them an instant crowd-pleaser that everyone will adore.
Table of Contents
Why You’ll Love These Mini Cherry Cheesecakes

You’ll adore making these individual cherry cheesecakes for so many reasons.
- Convenient Servings: Each cheesecake is perfectly portioned, making them ideal for gatherings without needing to cut slices.
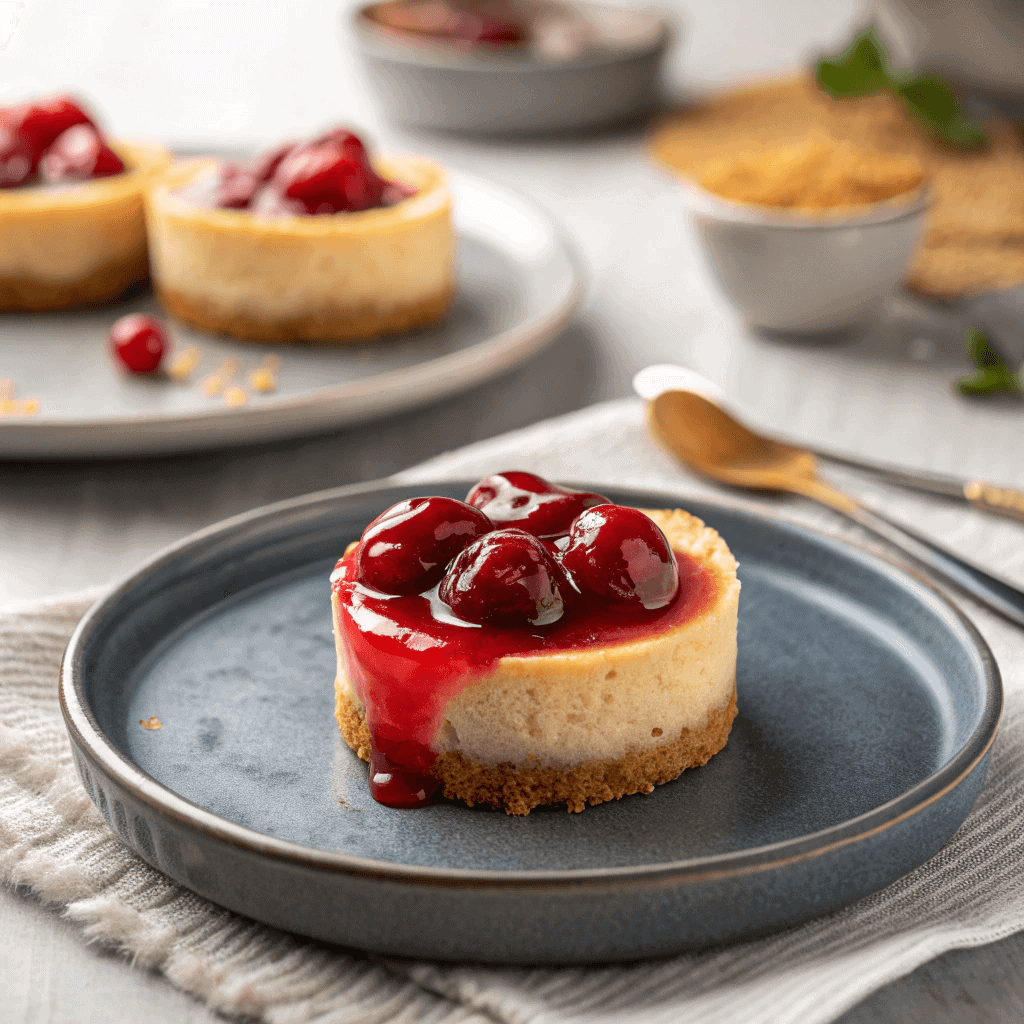
- Irresistible Texture: Enjoy a rich, creamy cheesecake filling contrasted with a crisp graham cracker crust.
- Sweet Cherry Flavor: The vibrant cherry topping adds a burst of fruity sweetness that complements the rich cheesecake beautifully.
- Customizable Fun: Easily switch up the crust or topping to suit your taste or the season.
- Make-Ahead Friendly: Prepare these delicious small cheesecakes in advance and store them in the freezer for effortless entertaining.
Ingredients

Creating delightful mini cherry cheesecakes begins with a few simple ingredients. You likely have most of these kitchen staples on hand already!
For the Crust:
- 1/2 cup unsalted butter, melted
- 1 1/4 cups graham cracker crumbs (about 9 full-size crackers)
- 1/4 cup granulated sugar
For the Cheesecake Filling:
- 2 packages (8 ounce each) cream cheese, softened (full-fat, block style)
- 1 cup granulated sugar
- 2 large eggs
- 1 teaspoon vanilla extract
For the Topping:
- 21 ounce can cherry pie filling
Notes & Substitutions
Always use full-fat, block cream cheese for the best texture in your mini cheesecakes; whipped or low-fat cream cheese contains too much water. Mashed.com explains that full-fat cream cheese is crucial for a creamy cheesecake texture. If graham crackers aren’t your favorite, feel free to substitute with finely crushed Oreo cookies, Nilla wafers, or shortbread cookies for the crust.
You can also experiment with different fruit pie fillings like blueberry, strawberry, or even apple to create new variations of these individual cherry treats. For a more homemade touch, prepare your own fresh cherry topping instead of using canned.
Equipment
You won’t need many specialized tools to create these delicious mini cheesecakes.
- Mini muffin pan: Essential for baking individual cheesecakes.
- Mini cupcake liners: Makes removal easy and cleanup a breeze.
- Food processor (optional): Great for quickly making graham cracker crumbs.
- Electric mixer (stand or hand-held): For achieving a smooth, creamy cheesecake filling.
- Tart shaper (optional): Helps create perfectly even and compact crusts.
Instructions

Making your mini cherry cheesecakes is a straightforward process. Follow these simple steps for a perfect dessert every time.
- Prepare the Crust: First, melt the unsalted butter in a microwave-safe bowl or small saucepan. In a medium bowl, combine the melted butter with the graham cracker crumbs and 1/4 cup granulated sugar. Use a fork to mix everything until it’s well combined and resembles wet sand. Line a mini muffin pan with mini cupcake liners. Press 1-2 teaspoons of the graham cracker mixture firmly into the bottom of each lined muffin cup.
- You can use a tart shaper or the back of a small spoon to compact the crust. Set the pan aside.
- Make the Filling: Preheat your oven to 350°F (175°C). In a large mixing bowl, beat the softened cream cheese with an electric mixer until it’s smooth and lump-free, about 1-2 minutes. Add 1 cup of granulated sugar and continue beating until just combined, scraping down the sides of the bowl as needed. Beat in the large eggs one at a time, mixing just until each egg is incorporated before adding the next.
- Finally, mix in the vanilla extract. Be careful not to overmix the batter once the eggs are added; overmixing can introduce too much air, which might cause the cheesecakes to crack.
- Bake the Cheesecakes: Carefully spoon or scoop the creamy cheesecake filling over the prepared crusts in the mini muffin pan. Fill each cup about two-thirds full. Place the muffin pan in the preheated oven. Bake for approximately 17-20 minutes. The mini cherry cheesecakes are done when the edges are set and slightly puffed, but the centers still have a slight wobble. Do not overbake them.
- Remove the pan from the oven and let the cheesecakes cool in the pan on a wire rack for about 10-15 minutes. Once slightly cooled, transfer them to the wire rack to cool completely at room temperature.
- Add Topping & Serve: Once the mini cheesecakes are completely cooled, spoon a tablespoon of the canned cherry pie filling onto the top of each cheesecake. Try to get at least one whole cherry on each for a beautiful presentation.
- For the best flavor and texture, cover the mini cheesecakes tightly with plastic wrap and chill them in the refrigerator for at least 2 hours, or preferably overnight. Enjoy these delightful individual cherry treats cold!
Pro Tips & Troubleshooting
Achieving perfect mini cherry cheesecakes is simple with a few smart tips and by avoiding common pitfalls.
Common Mistakes to Avoid
- Overmixing the Batter: Beat the cream cheese until smooth, but once you add the eggs, mix only until just combined. Overmixing incorporates too much air, which can cause cracking during cooling.
- Cold Ingredients: Ensure your cream cheese and eggs are at room temperature. This helps create a smooth, lump-free batter and prevents overmixing.
- Sudden Temperature Changes: Avoid removing the cheesecakes from the oven and directly placing them into the refrigerator. Sudden changes can lead to cracks. Let them cool gradually.
Expert Tips for Success
- Test for Doneness: The centers of your individual cheesecakes should still have a slight wobble when gently shaken; they will continue to set as they cool. Overbaking leads to dry, cracked cheesecakes.
- Use a Tart Shaper: For perfectly even and compact crusts, use a tart shaper or the bottom of a small glass to press the graham cracker mixture firmly into each liner.
- Chill Completely: Proper chilling is crucial. It allows the cheesecake to fully set, develop its rich flavor, and achieve that wonderfully creamy texture. For the best results, chill overnight.
Serving Suggestions, Storage, and Variations

These bite-sized cherry cheesecakes are incredibly versatile, making them perfect for any occasion.
Serving Ideas
Serve your chilled mini cherry cheesecakes with a generous spoonful of cherry pie filling. For an extra touch of elegance, add a dollop of fresh whipped cream on top of the cherry filling. A sprinkle of chocolate shavings, a drizzle of chocolate sauce, or a few fresh berries (like blueberries or raspberries) can also enhance their appeal and flavor. These little cheesecakes are perfect on their own, but these additions make them extra special.
Storage Instructions
Store leftover mini cherry cheesecakes in an airtight container in the refrigerator for up to 3-4 days. For longer storage, you can freeze them without the cherry topping. Arrange the baked and completely cooled cheesecakes (without topping) on a baking sheet and freeze until firm, about 1-2 hours.
Then, transfer them to a freezer-safe bag or container, separating layers with parchment paper, for up to 1 month. Thaw frozen mini cheesecakes in the refrigerator overnight before adding the topping and serving.
Creative Variations
Get creative with your mini cheesecakes! Beyond graham crackers, try an Oreo crust for a chocolatey twist or Nilla wafer crumbs for a vanilla-infused base. Experiment with different fruit toppings like canned blueberry, strawberry, or peach pie filling. For seasonal flair, try a pumpkin spice filling for autumn or a zesty lemon curd topping for spring.
You can even mix in miniature chocolate chips or a swirl of caramel into the cheesecake batter before baking for unique flavor combinations.
Nutrition Information
Please note that the nutritional information provided below is an estimate. Actual values may vary based on specific brands, preparation methods, and exact ingredient measurements.
| Nutrient | Amount |
|---|---|
| Calories | 66 kcal |
| Carbohydrates | 10 g |
| Protein | 1 g |
| Fat | 3 g |
| Saturated Fat | 1 g |
| Polyunsaturated Fat | 1 g |
| Cholesterol | 13 mg |
| Sodium | 17 mg |
| Sugar | 6 g |
FAQ
Can I make these in a regular muffin pan?
Yes, you can! Use regular-sized cupcake liners and increase the baking time to about 25-30 minutes.
Why do my mini cheesecakes sink or crack?
Sinking often occurs from overmixing the batter, which incorporates too much air. Cracking can happen from overbaking or sudden temperature changes during cooling. Learning how to avoid common cheesecake baking mistakes can help ensure a perfect dessert.
Can I use homemade cherry pie filling instead of canned?
Absolutely! Homemade cherry filling adds a lovely fresh touch to these delicious mini cherry cheesecakes. Just ensure it’s cooled before topping.
Conclusion
These delightful mini cherry cheesecakes truly are a testament to how simple baking can be. With their easy-to-follow steps and incredibly satisfying flavor, they’re destined to become a staple in your dessert rotation.
Don’t hesitate to whip up a batch for your next gathering or just to treat yourself to a perfect, bite-sized indulgence. Get ready to enjoy the irresistible charm of these individual cherry cheesecakes!
Mini Cherry Cheesecakes
Ingredients
Equipment
Method
- Preheat oven to 350°F (175°C). Line mini muffin pan with cupcake liners.
- Mix melted butter, graham cracker crumbs, and 1/4 cup sugar until combined. Press into liners to form crust.
- In a large bowl, beat cream cheese until smooth. Add 1 cup sugar and beat until combined. Beat in eggs one at a time, then vanilla.
- Spoon filling over crusts, filling each liner about 2/3 full. Bake for 17–20 minutes until set but slightly wobbly in center.
- Cool in pan for 10–15 minutes, then transfer to rack. Once cooled, top with cherry pie filling. Chill for 2 hours or overnight before serving.


2 thoughts on “Delicious Mini Cherry Cheesecakes: Bite-Sized Bliss”